
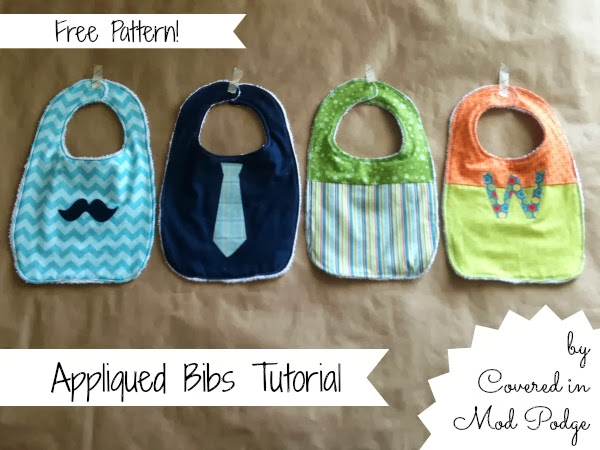
I first shared this tutorial over at The Ribbon Retreat Blog as a part of their Oh Boy! series. These great little boy bibs make excellent baby shower presents. A quick change of the fabric and appliques and these bibs are perfect for the little girls in your life as well.
To make your bibs, first print out the pattern (its two pages) and tape it together. Then, grab yourself a fat quarter of quilting cotton, some heat n' bond, terry cloth, and velcro and you'll be set to make an adorable, appliqued bib!
Download your pattern here. Please remember that this is for personal use only! If you're going to share this pattern, please share the full post and not just the pattern!
Start by cutting out your pattern. There's two different options with the pattern. The first is to cut a solid piece. The second is to use two fabrics to make up your bib.

Lay your pattern along the fold of your quilting cotton with some pattern weights (or cans of beans if you're cool like me!).

Slowly cut around your pattern using your rotary cutter. If you are using two fabrics, follow the lines on the pattern as to where to cut each fabric.
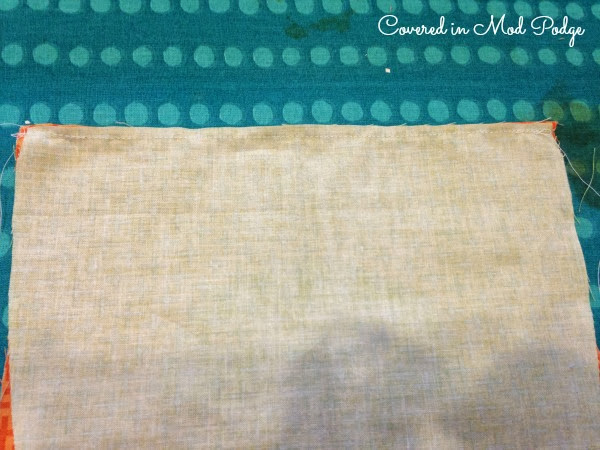
If you're using two fabrics, place the two fabrics right side together and sew them using a presser foot seam allowance. Then, press the seam upwards.

Time for the applique!
There's a couple of different ways to get your applique. You can freehand a pattern, you can print out a template, or you can use a craft cutting machine to cut out your shape.

To prep your fabric for cutting the applique, cut a rectangle of fabric about an inch bigger than your final shape. Then, cut a rectangle of heat n' bond that's just a tinny bit smaller than your piece of fabric. Place your fabric, wrong side up, on your ironing board. Then, place the heat n' bond, bumpy side down (and paper side up) on top of the fabric. Press for about five seconds.
At this point, you can draw/trace your image on the paper part of the heat n' bond and then cut it out. Don't forget to flip the image if necessary! Or, follow your craft machine's instructions for cutting out the shape you want to applique.

Once you've got your shape cut out, peel off the paper backing.

Place the applique on the bib, fabric side up. Now press for about five seconds.

Now, to sew down your applique. Set your machine to a zig-zag stitch. You want the stitch length and width to both be very small. I set my length to 1 and my width to 1.5. Each machine is different so its best to play around on a scrap piece of fabric before tackling your applique.
The name of the applique game is slow, slow, and slower. You have to sew very slowly making a lot of adjustments as you go.

Curves can be a bit of a pain. Looking at this mustache, you can see that there are two kinds of curves- mountains and valleys.

When making an adjustment on a mountain, keep your needle down in the applique. Then lift the presser foot and make an adjustment. You might have to make adjustments every stitch or two depending on how big or small the curve is.

When making an adjustment on a valley, keep your needle down in the fabric. Lift your presser foot, adjust, and keep sewing. Again, you'll need to adjust often and sew very, very slowly!

Now to cut the terry cloth. You can buy terry cloth by the yard at the fabric store. I normally stock up on the cheapo towels at Target when they go on sale. I can get four bibs out of a towel for less than $2!

Instead of cutting a perfect bib out, I fold the terry cloth in half and set the bib pattern a bit in the middle. Then, I cut a general shape. This is because you end up trimming everything down later (that and I'm lazy).

Pin the wrong sides of the terry cloth and the bib together. Make sure you mark a three inch turning gap on the bottom.

Sew the bib using a presser foot seam allowance. Go slowly around the curves and adjust as necessary.

Now it's time to trim. Using pinking sheers, trim close to your seam allowance. Be very careful to not clip the seam. If you don't have pinking sheers, just trim the terry cloth down to the same width as the quilting cotton. Then, clip the curves so that everything will lay nice.
Time to turn your bib. Make sure you get all the curves laying nicely.
Press well, tucking the gap into the bib. Pin. Then, top stitch the entire bib.
Almost done! Cut yourself an inch strip of velcro. Pin one piece of velcro to the right, top of the quilting cotton and the other piece to the left, bottom of the terry cloth. Stitch down the vlecro and you're all done.

Now you're all set to bib up your drooling, always mess making, adorable little boy! Or, if you're like me an only have a girl, you're ready to gift these bibs as shower presents for adorable, chubby-cheeked future men!

Here's a list of the fabric I used:
Mustache Bib- Bib Chevrons Small in Aqua, Applique Bella Solid in Navy
Tie Bib- Bib Bella Solid in Navy, Applique Life in the Jungle in Blue Plaid
Two Fabric Bib- Pieces of Hope in Green Star and Cruise Blvd in Blue Stripe
W Bib- Bib Life in the Jungle in Green and Orange Tic Tac, Applique Cruise Blvd in Blue Hexi
The Ribbon Retreat provided me with the fabric in exchange for this tutorial. I work with The Ribbon Retreat because the offer a quality product and excellent customer service. If you have any questions, check out my disclosure page.
Come party with me! C.R.A.F.T, Mommy By Day, Crafter By Night, Shwin & Shwin, Tip Junkie, Southern Lovely, Uncommon Designs, Somewhat Simple, Yesterday on Tuesday, House of Hempworths, 52 Mantels, The CSI Project, Serenity Now, Tatertots and Jello, Family Ever After, The Grant Life, Positively Splendid, I {Heart} Nap Time

Michaela, these are all so cute. My friend is having a baby due in Feb. I would love to make something like this for her. Thanks for sharing your tutorial.
ReplyDeleteThanks Brandi! They're a quick sew and so easy to personalize. I'd love to we what you end up making!
Delete