11.30.2011

Coffee Filter Wreath {or its so fluffy!}

Coffee filter wreaths are floating all over blogland these days. I decided I'd have a go at it. I'm thrilled I did!


So while making my coffee filter wreath for my Christmas mantel, I just kept thinking that it looked so full and fluffy. It didn't take long to exclaim "Its soooooo fluffy!" a la Despicable Me.

{And now for your viewing pleasure...}


{And now back to your regularly scheduled post...}

I'm impressed how this wreath went from looking like a hot mess to exactly what i wanted in a short time. If you give this a shot, don't worry....you'll get pass the hot mess stage.

I used a plumbing tube for my wreath form. After a tragic fail the first time around, I decided to give it another go. If so many people were saying to use these little 97 cent wonders worked, I figured I was the problem. Then, one day during my normal waisting of time on Pinterest, I discovered a way to fix my problem. Now, I suck and I don't have the link to share. I also feel awful about not being able to give proper credit where its due. Please, please, please let me know where I should be giving credit to if you've seen the post with this amazing trick.


Basically, you pull the tubing apart along the perforation. Then, you roll one side in on the other. You use hot glue to secure it. Make sure you work in small sections and hold it down until the glue cools. This is one of the more time consuming parts of the project. After you've glued the whole thing, duck tape it into a ring. I had to squish it around a little after taping to get it into a circle. Because the tubing is grey and I was working with white, I glued a layer of left over white felt down before I got started.


Now there are tons of different tutorials on coffee filter wreaths out there. {You can check out some here, here, and here like I did.} I didn't do anything that reinvented the wheel here. However, most of these tutoirals suggest using two or more packs of dollar store coffee filters. I only used one pack of filters from the dollar store. In fact, I was done with three left over. Annoyed, I just shoved the three into random places. Yah...I'm occasionally a vindictive crafter. 


This is quite the fluffy wreath. I think that it would be a little overwhelming on my door. But I like how it looks up on my mantel. I think it balances out the Christmasy colors of my other decorations. 


Here's an action shot.

{You can find the Christmas Mantel post here.}

11.29.2011

My Christmas Mantel {or joy to the world}


With Christmas fast approaching, I've started to decorate. We had very few decorations to begin with, so I've been creating up a storm lately. My first pride and joy I'd like to share with you is my faux mantel's Christmas revamp. 


I made the yarn wrapped treas, the "JOY" letters, and the coffee filter wreath. We already owned the hurricanes and I filled them with ornaments from Target's Dollar Spot.


Here's the details on the coffee filter wreath, the yarn wrapped letters, and the yarn wrapped trees.


Happy last day of November! Welcome to the Advent season.


Oh Wow! :) This post was featured at:


11.26.2011

Heart Wall Art {or a handmade gift exchange}

Linda over at Craftaholics Anonymous is yet once again hosting a Handmade Gift Exchange. When I found out about this wonderful opportunity, I jumped at the chance to participate. After exchanging a few emails with my exchange buddy, I was off to the races.

I decided to create a piece of wall art out of maps. 


I started by tracing a heart onto my 6x6 inch canvas. 


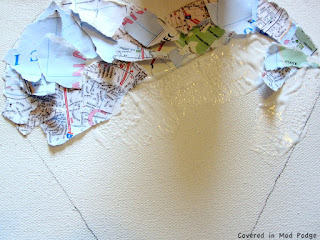
Then came the really fun part. I got to rip a map up into a ton of little pieces. I even let my little miss get in on the action! I used a map I had leftover from a wedding gift for one of my husband's college roommates. 


As so frequently happens around here, I turned to the Mod Podge to make quick work of this project.


I applied a thin layer of Mo Podge to the canvas and spread out my map pieces. I made sure to break up the ocean blue from the street and park pieces. 


After I finished filling in the heart, I put two coats of Mod Podge over it. I let the Mod Podge dry for about thirty minutes between coats. 


I'm pretty in love with the final product. I hope my exchange buddy feels the same way!

If you'd like to see other projects made for the Homemade Gift Exchange, check out this link party and this Flickr group.


Necklace Refashion {or a cheap way to get a new necklace}

With the little miss around, we're lying low for this year's post-Thanksgiving shopping madness. Don't get me wrong, I perused Target yesterday {at noon}, but did so on my own. So we're having a relaxing weekend full of football. It's giving me plenty of time to be craftsy. I'm thrilled! 

First on my list for this weekend was creating myself a new necklace. A couple of years ago I found a really cute necklace at an SPCA thrift store. The best part....it was like $2.50. However, I didn't have any cash and there was a $5 minimum charge for plastic. So, I just had to get another necklace. I picked up this little beauty.


While I really like this necklace, I've never worn it much. it always hit me a little weird. So, I decided to try to deal with its awkward length. Ribbon was my solution! 


First, I played with the necklace to see how I could get it to fall nicely on me. 

I bought about a yard of black grosgrain ribbon and then cut it in half.


I laid one side of the ribbion under one of the points I wanted to attach the ribbon to. I then added some hot glue and wrapped the ribbon around the necklace. 


{Sorry for the fuzzy picture.}

I repeated the above on the other side of the necklace. 


Finally, I cut the ribbon edges on a angle and then added some Fray Check.


And vola! A new necklace for the cost of a yard of ribbon {bought with a coupon!}, some hot glue, and a necklace I already had!


11.22.2011

Handmade Christmas, Part 1 {or felt flower broaches for an aunt}

Moving so far from family has added a HUGE cost to this year's Christmas. This left our gift giving budget at an almost non-existant level. That, coupled with the desire to give meaningful presents has lead me to hand make many of our gifts. I plan on sharing these gifts over the next couple of weeks.

First up is a gift for one of my husband's aunts. She is in her mid fifties and often found in seasonally themed sweatshirts and broaches. So, I decided to run with the broach theme.


I picked up a pack of pins with flat fronts at Joann's using a 50% off coupon {Hint: Joann's takes competitors' coupons. I'm sure all you savvy crafters already knew this, but I just got the memo!}. Then, I went to town. I used felt scraps I had on hand. So, this cost be about $1.50 {It probably would be around $3 if you had to buy felt}.

Pinterest is full of felt flower tutorials. I found this one to make this dahlia. I wanted another row, but cut my foundation circle too small. Next time, I'll lay it out before I glue {well...maybe}.

Since I had leftover petals from the dahlia and I was too lazy to cut out another color {I mean, she really likes purple}, she gets two purple flowers! This one was just all the petals strung together and then glued onto a center circle. 

And now I brag. I made a pretty awesome poinsettia. I'm loving my poinsettia. In fact, I think i'll be making more of these to decorate the house with!

I can't take credit for this little guy. I got these shapes pre-cut from Marie May Favorites' Etsy shop. She had amazing prices on fold over elastic and was wonderful to work with so I added some precut shapes to the mix. I'm really glad I did!

I'd love to know what you're making for your friends and family for Christmas! Leave a link in the comments, please :)


Come party with me!

11.15.2011

More Fun with Onesies {or white is just so boring}

Yesterday's nap time was filled with onesie fun. My little miss is getting taller by the day. Its also finally turned cold here. She's no where near ready for 6m. Really, 3-6m are huge on her. But they're the only long sleeved outfits I have, so I decided to go with it and make them cute. She'll grow into them too quickly!


For the first onesie, I used this awesome idea over at Kojo Designs. I used a couple of her dad's old shirts {yeppie for an excuse to get rid of some of his shirts!} and kept the seams inside rather than exposed like the tutorial. I'll defiantly be making more of these! I also think I'll be cutting the bottom off the onesie so there's no snaps to deal with. 

For the second onesie, I wanted to have some more fun with freezer paper. However, the printer was being temperamental and didn't want to print directly to the freezer paper. 


Since play A didn't work, I printed out the shape of CA and then traced it onto the freezer paper. I used an exacto knife to cut out the shape. After painting and sealing the paint, I knew it needed something more. 


I looked around and there's a big trend out there to put a heart on the place that's special to you. While adorable, this is hard. I'm from Southern California, my husband is from far Northern California, and we met and got married somewhere in the middle. Torn, I decided to {poorly} hand embroider a heart next to the state. Its a whole lot of state love!

Come party with me!

11.14.2011

Operation Christmas Child {or start a new family tradition}


I just wanted to share a quick little post to encourage you all to fill up a shoe box to make Christmas special for a kid {or two or three or...}. You can do this through Operation Christmas Child at Samaritan's Purse.

It would be great new family tradition to start this year. Its a new {hopefully} tradition for mine. Plus, it was fun to see how far I could make my budget stretch!

It's very easy to do and can be done on a budget! Go dig through your closet and find a shoe box. Then head to the Dollar Store or the dollar section at Target at find as many fun little treats as your budget will allow. Also, don't forget to check out the clearance section. That's where i found the ADORABLE shirt that I got.


Operation Christmas Child has instructions on how to pack a box. You can also find a drop off location that's close by. Here's the kicker...you must drop off by November 21st (that's THIS Sunday!).


I'd love to see what you're sending in your box!

11.09.2011

Thanksgiving Onesie {or gobble gobble}

I try to get a little blog reading in every morning before my little miss wakes up. Its a nice, relaxing way to start the day. Yesterday morning, I started my reading with Tatertots & Jello {as I frequently do} and instantly fell in love with the Typography Pillow Jen made for Thanksgiving. I had already been mulling over Thanksgiving onesies for little miss. Jen's pillow was just the inspiration i needed!


I set out with my newfound love of freezer paper to make a typography onesie. Thankfully, I was able to get my new printer to like the freezer paper this time around.


I waited for my husband to get home to cut out the gobbles. He's much better with an exacto knife than I am! Also, he had a brilliant idea of how to get the little circles inside letters like g, b, and e without having to cut them out. A hole punch! So, I hole punched a bunch of little circles while my husband made quickish work of cutting out the letters.

After adhering the freezer paper stencil to the onesie, I followed the directions on my paint bottles. A little bit of overnight drying and I had myself a cute onesies for my little girl's first Thanksgiving! {and the need for a Silhouette!} It just got cold here, so she'll be breaking it in today!


She's not quite tall enough for the exersaucer but man she loves it! It makes for some very funny poses.


Come party with me!