1.31.2012

Casserole Carrier {or wedding present: part 1}


One of the things my darling friend is know for is her incredible hospitality. Be it at her own home or others, she always has something to share. So, I figured I'd add to her arsenal by making giving her a Pyrex dish with an insulated casserole carrier. 


I found this amazing little creation through Homemade by Jill. The pattern is from 2 Little Hooligans. I followed Jill's suggestion and used belting instead of handles. I'm glad I did. 


I'm just in love with the navy houndstooth. The inside fabric has little white circles on it which you can't really see in the pictures. Both fabrics were bought at Joann's. I think I'll be finding more things to do with the houndstooth!


I accidentally bought only 1/2 a yard of insul-brite when it calls for a yard. So I had to get a bit creative. As a result, the skinny piece only has the insul-brite on the bottom.


I think it worked out ok.

Be sure to check out this post to see what I did to make the Pyrex special!


1.30.2012

Just a Moment Monday {or a blog swap}

We will be taking a break from our regularly scheduled Just a Moment Monday for a blog swap. Be sure to drop by Craftionary to check out my dino gift set!


1.27.2012

A Few Amazing Posts {or kicking my rear into gear}

There have been amazing Valentine's Day projects all over blog land for a couple of weeks now. I have barely considered V-Day. I came to the realization today that if I don't get a move on soon I'll have to take stuff down as soon as I get it up. I wanted to share with you all some really wonderful crafts and decorations that are helping get me in the V-Day crafting mood.


Holly @ My Sister's Suitcase created these amazing Ombre Love {Yarn} Letters.


I'm in love {haha...love...get it?} with Emily @ 52 Mantles Sweetheart banner.


This Felt Heart Garland by Alison @ Oopsey Daises uses fun, non-traditional colors to brighten up her room.


Jody @ Homey Home Designs turns adorable PJs into a great wreath. I really should start working on my February Wreath seeing as February starts Wednesday!

I hope you all have a wonderful weekend!


1.25.2012

50 Followers {or thank you so much!!!!}

{Source}

I reached 50 followers today. I can't thank you all enough for wanting to be apart of my little blog. I am flattered beyond words. I hope to continue to be apart of each of your creativity seeking process. Thanks for making my day!

Wedding Activity Books {or fun for the kiddos}


{Super Cool Wedding Activity Books}

The wedding I went to this last weekend was for a dear friend from college.  She married a fun, kind man and I couldn't be more happy for the two of them. 

When I got married Tif was amazing. She helped set everything up and made my big day look beautiful. I jumped at the chance to help her out. There was all kinds of fun icing cupcakes and setting up the wedding with the little miss strapped to me in her carrier. She was in a mommy kick as we traveled, so it made setting up really interesting. However, the wedding turned out fabulously!

I made some sweet little activity books for the kiddos to color and play with during the reception. There's just so much sitting and watching during wedding receptions...I wanted them to have something to keep them busy and well entertained before all the fun dancing started. 


I used these amazing activity books from Chelsea at Lovely Indeed. It was a wonderfully done book. When printing it, I goofed and didn't do a double sided print. So I made the best of it and deiced that meant the kiddos had extra blank pages to let there imaginations go wild with. {At least that's what I told myself to keep me from throwing a box of crayons across the room at goodness knows what hour of the night before a way to early in the morning flight.}


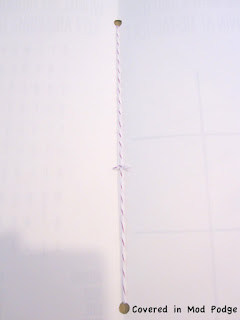
In order to make the books, I folded them in half and then hole punched the top and bottom. 


I got to play with baker's twine for the first time. I got a great deal on Devine Twine from Scrap Pantry on Etsy. While I would defiantly recommend this shop, the yardage came in two cuts. If for some reason you need 20 continuous yards, you might want to include that a message to the seller.


I loved using the bakers twine to bind the books. I just treaded it through the holes and then tided a knot that I hid inside. A bow on the outside would have looked adorable. But, I didn't want to give little hands a way to take the book apart.


I put the books on the tables where the kiddos were sitting {per the bride's request} and paired them with a pack of crayons. I found a 24 pack of Rose Art crayons for 47 cents at Target. While I'm not a fan of Rose Art, I didn't know the kiddos. And since Rose Art are Gluten Free, I didn't have to worry about a kiddo being left out. Also, it was easier just to buy these little boxes than have to break up a big box of Crayolas. 


1.24.2012

Turkey Burgers with Molasses BBQ Sauce {or auntie liz came to guest post!}

I am beyond excited to have my first guest blogger here today! She is the incredible Liz who has a yummy little blog over at Not Everything I Make is Pretty. If you need something to make for dinner tonight, you should really go check her blog out! Everything is delicious {and I'm only partially saying this because she's my little miss's aunt and I want her to keep the fun presents coming!}

Liz and her boyfriend are currently living 1,200 miles apart. They do this wonderful weekly dinner date where they cook the same meal and share it via webcam. Liz was kind enough to let us in on one of her yummy date night recipes. And now I turn it over to Liz...

Michaela! Thanks for the guest post invite. I hope you get a chance to make these Turkey Burgers with Molasses BBQ Sauce soon, they're wonderful. 


Chris and I made these yesterday for our long distance date night, he sent me a few of his pictures to add in too. 
We did all of the chopping first and then the order of operations was combining the salad ingredients, cooking and warming the sauce then we mixed and grilled the burgers.  Enjoy!
For the Salad:
1 Limes, Zest and Juiced
2 Tbsp Olive Oil
1/4 Red Onion, Thinly Sliced 1/4 Cucumber, Chopped Spinach, Coarsely Chopped
For the Sauce:
2 Tbsp Olive Oil 1/2 Red Onion, Chopped
2 Cloves Garlic, Finely Diced
1/4 Cup Apple Cider Vinegar
3 Tbsp Molasses
1 Cans Fire-Roasted Tomatoes (15 ounces)

For the Burger: Ciabatta Bread
1- 1/3 pounds all-white-meat ground turkey breast (about 1 package) 1 Egg
1 Tbsp Olive Oil 3 Scallions (Green Onions), Finely Chopped
1/4 Bunch of Cilantro, Finely Chopped
1 Tbsp Ground Cumin 1 Limes, Zest and Juiced Salt & Pepper 1 Packages of Goat Cheese
(Recipe originally from Rachel Ray edited and finagled with JH.)
Place the Chopped Spinach, Cucumber, Sliced Red Onion, the Lime Zest and the Lime Juice in a bowl. Add 2 Tbsp of Olive Oil, season with salt and pepper and toss to combine. Set aside.
The Molasses Barbecue Sauce: In  a medium size sauce pot over medium-high heat and add 2 Tbsp of Olive Oil. Add the Chopped Red Onion and Garlic and cook for 3-4 minutes, or until Onion becomes slightly tender. Add the Vinegar and Molasses, cook for another minute, then add the tomatoes. Bring up to a light bubble and cook for 10-15 minutes. Leave on the stove at a low temp to keep warm.

In a medium size bowl, combine the Ground Turkey, Scallions, Cilantro, Cumin, Salt, Pepper, Zest of 1 Lime and one Tbsp of Olive Oil. Score the meat into four equal parts and then form four 1 1/2-inch thick patties. Place a small chunk of Goat Cheese in the middle of each patty. Drizzle with Olive Oil and place on the grill for 6-7 minutes per side, or until cooked through.
Toast the Ciabatta on the Grill or Grill Pan on both sides. To serve, place a piece of Toasted Bread on a plate and top with a couple spoonfuls of the molasses barbecue sauce. Place the Turkey Burger on top of that and then finish it off with the Salad.


Come Party with me!

1.23.2012

Just a Moment Monday {or I've officially lost my mind}

My little miss is a champ. She is great on airplanes. She smiles, giggles, and is all together cheery. She'll get a little fussy when she gets hungry or tired. But overall, she isn't too bad to get stuck next to on an airplane.

But then we get wherever we're going and I want to cry. She goes to sleep on west cost time and then wakes up on central time. So 4 am rolls around and she is so very excited to be awake {silly morning baby!}. The little miss forgets to nap but doesn't forget to be fussy. She does great with other people when we're at home. But traveling is just too much for her. So she wants to spend most of the time in my arms. Its sweet that I am her comforter, but a girl has got to pee sometime!

{sorry for the iPhone photo}
When we travel, she sleeps in this awesome little baby tent. It cracks me up. I'm not sure its her favorite thing, but its light and portable. Since we fly most of the time, that's a must. 

While I will loose my mind with all of this clingy and no sleep baby, I'm happy we schlepped ourselves out here. We came to California to see a college friend get married. We're at the point in our lives where someone is getting married every other month. We've missed the last couple of weddings because of the distance, the cost, or being too pregnant to drive to the grocery store let alone want to fly across the country. {And, we'll be back in California again in a couple of months for another wedding....some of these you just can't miss!}

It was the first time many of my friends had meet my little miss. We're the first of the group to have kids. Its really funny...some of these guys have no clue what to do with a kid! But there is a lot of joy in seeing people important to you make your baby smile.

In the coming weeks, I'll be sharing all kinds of wedding and travel related fun. I mad my little miss' dress as well as activity books for the kiddos at the wedding. I also made airline bribes to keep happy neighbors! I hope they can make your travels a little better {or your little miss a little cuter on your next special occasion!}.

1.17.2012

Lace Infinity Scarf {or what on earth did I buy?}

This really is part five of my Handmade Christmas series. I knew I wouldn't be seeing one of my college roommates until about a month after Christmas. So, instead of adding another thing to get done before Christmas, I decided to make this scarf in January.

My roommate has a love affair with scarfs. It made deciding what to make her quite simple. So I picked up 6 inches of black jersey and 6 inches of stretch lace. When I sat down to sew, I found that my black jersey was a tube. I have no clue what I bought!


So I snipped the silly tube and got to work. This simple little scarf was made by sewing up a tube out of each of the two materials. I then turned the tubes right side out. Its jersey, so there's new ironing required! Yeppie!


Little miss decided to stick the entire receiver in her mouth while I was sewing.


I finished the scarf by folding in each end of the jersey 1 inch. I then stuffed the jersey into the lace about two inches. If you look closely, you can see my stitching at the top and bottom of the overlap. I repeated this process on the other side to make the infinity loop.


I then ran back to the bathroom to take pictures of the completed scarf. I was so proud of myself. I was in "going out clothes" {meaning a jeans and shirt rather than yoga pants and a sweatshirt}. Then, I realized my shirt was black and so was the scarf. It didn't work. So close! But I changed just for you all to see this fun little {super easy} scarf.


Come PARTY with me!

1.16.2012

Just a Moment Monday {or a really bad paint job}

How is it Monday again already?

When we moved to Texas, we rented our first house. We were giddy at the prospect to be in a house with no neighbors upstairs singing at three am. Plus, the management company said we could paint the walls nearly any color we wanted! 

We were drunk with power. As soon as we got the keys we got paint paint samples. We painted our room without power and before any of our stuff showed up. Well this plan came back to bite us in the butt.

We ran out of paint right at the very end. We had like half of one wall and the ceiling line of two and a half walls left. So I skipped off to Lowe's with the little number sticker that comes on the top of a paint can. I went to the closest Lowes, which was not the store we bought the first paint can at. By the time I got back, we were loosing light and started painting quickly.

We finished up, cleaned up, and didn't come back to the house for three days. When I walked into the room, I was mortified. Apparently different paint machines put out slightly different paint. And, as a result, several of our walls were two-toned.


I've been toughing it out ever since. We haven't had the time, energy, or budget to fix the problem. A couple of weeks ago, something inside of me broke. I stared yelling at the walls. {Let's blame sickness and sleep depravation for that little episode.} So, I've started saving money to deal with the problem.

I liked the color of the paint for the bedding we had then. However, we got new bedding for Christmas.  So I want a fresh look for the room to go with the fresh bedding. Here's a link to the bedding that does a much better job of showing the color.


So, I ask you...What color should I be painting my walls? Do you have any paint horror stories?


Come PARTY with me!


1.10.2012

Soctopus {or part of a baby shower gift}

A while back, I shared the baby shower gifts I made for my friend's little girl. I wanted to share a quick little tutorial on how I made the Soctopus! One of the best parts of this project...you get two for the price of one!

I got the idea for the Soctopus from this cute little post on making a sock out of an owl. I had already made an owl for my little miss, so I went to thinking what else I could make out of a sock. Hence, soctopus!


First, pick up some cute adult sized, knee high socks. I got mine for $2.50 at Target. And, can I say, they are cute! I might have to go back for a pair for myself. It gets chilly here!


Stuff the sock with poly fill. Stuff as much as you'd like to get the shape you like. 


Now, this is a very, very importnat step. Take time to laugh at your daughter {and your husband who left the magazine on the floor} as she eats her daddy's ESPN Magazine. 


Cut some felt eyes and hot glue them on.


Push all the stuffing up as far as you can. Then, sew a zig-zag stich as close up to the wad of stuffing as you can. 


Cut the band off the bottom of the sock and then cut yourself eight {its an octopus after all} arms.


Repeat all the above steps for soctopus #2. Then, give one to your little one to enjoy and pass one along for a friend {or do as I did and give it as a shower gift!}

Let me know if any of that was jumbled. I wrote it in several sittings between chasing down the army crawling fiend that is my little miss these days. {And my husband delivered the heart breaking news today that we won't be able to install a baby gate between the living room and the kitchen. ARGH!}

Come party with me!