I first shared this tutorial over at The Ribbon Retreat. I have a big old crush on this quilt, so I wanted to make sure you all got a chance to see it! The Ribbon Retreat provided me with the fabric for this quilt in exchange for a tutorial. Questions? Check out my Disclosure page!
My daughter is getting to the age of transitioning from a crib to a big girl bed. Thankfully, she is showing no signs of crawling her way out and is quite content with her current sleeping arrangement. We have a convertible crib that we'll transition to a toddler bed. While we were blessed with a hand me down Pottery Bar bedding set that has served us well, I'm excited to use this bed transition as an excuse to get some momma made into my little miss's bedding.
The finished quilt is a generous toddler 67X42 inches. It's a bit big for a toddler bed but great for growing with the kiddo. I envision that in years to come she'll use it as a lap quilt.
I am a relative quilting novice. This quit design is perfect for novice and expert quilters alike. You can make this quilt a breeze by buying two jelly rolls to avoid cutting. The strips make cutting and sewing fast. The ruffles give the quilt great texture and a little something different.
I'm going to call my fabrics A, B, C, D, and R (for ruffles). I'm a rather conservative pattern kind of gal. Therefore, I went with a repeating pattern of my fabrics. You could totally mix the order up to something random if you are braver than I am. Do what seems right for your style and your fabrics.
Hands down the best thing about quilting is that you don't have to prewash your fabrics (yes, I hate pre-washing that much!). You should, however iron all of your fabrics before cutting. This will allow for a much more accurate cut and a better final product.
First, let's cut your strips. You'll need to cut 6 strips 3 inches wide by the width of the fabric (WOF) of A, B, and C. You'll need 5 strips 3 inches by WOF of fabric D. You need 10 strips 3 1/2 inches wide by WOF of fabric R. The increased width of R is to allow for the ruffling seams you'll run down both sides of the fabric.
Speaking of ruffling, it's the first thing to take care of. We're going to start by turning the 10 strips into 5 super long strips. Pin the short sides of two strips right sides together. Sew using a presser foot seam allowance.
Press the seam to one side. Repeat this process until you have your five strips.
You're going to run ruffling seams down both of the long sides of each strip. If you have a preferred ruffling method, please use it. I'm a fan of setting my tension to the tightest setting and my stitch length to the longest setting. Leaving some seriously long strings, sew a stitch down the side, making sure NOT to back stitch at the beginning or end. This should magically ruffle your strip. If you aren't getting a tight enough ruffle, you can apply gentle pressure to your thread right after it comes off the spool. Repeat this process for both sides of all five ruffle strips. The long strings allow you to easily adjust your ruffle if necessary.
Now, it's time to piece the top. You're going to sew your strips together in your pattern or randomness of your choice, using a presser foot seam allowance. If you're following my pattern, it's A, B, C, D, R and repeat.
To start, pin your first to strips right sides together and sew. Press your seam (up, down, open...it's really your preference here). The take your next strip and continue the process.
When you hit the ruffle strip, use the stitch line on the ruffled fabric rather than the edge of the fabric as what you match your other strip up to. This will make sure that your ruffle stitches are all hidden and don't make an unwanted appearance on the front of your quilt.
Before pressing the seam, trim your ruffle seam down to the same height as your regular strip.
And this point, I recommend putting this chunk of your quilt aside and starting the pattern fresh again. This keeps things from becoming too unwieldy. Your very last chunk of quilt should be just an A, B, C chunk.
Now, go ahead and join the chunks of your quilt together. Use your rotary cutter to even up your quilt edges. Then, ta da! You have a quilt top all pieced!
Now it's time to talk quilting. I highly recommend using painters tape or masking tape and curved quilting safety pins to help in this process.
You'll want to cut your quilt backing about two inches bigger than your quilt top. For me, this was 44 X 69 inches. Then, cut your batting about an inch bigger than your quilt top (43 X 68 inches).
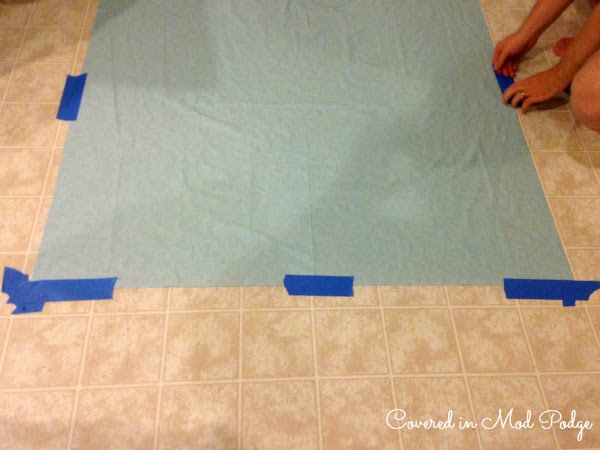
Find a clean, smooth surface to work with. Lay out your backing fabric, wrong side up. Work carefully to completely smooth it out. Place tape around the perimeter of your fabric to help hold everything in place.
Center your batting on top of the quilt backing.
Then, center your quilt top on the batting.
Now, it's time to get to work with your curved quilting pins. You should start in the middle and work your way out. Stagger your pins about every two inches. When pinning, keep in mind where you'll be sewing your quilting lines. You want to keep pins out of the way so you don't run into one and snap a needle.
Before you start quilting, change your bobbin to a color that blends in with your quilt backing. Roll your quilt up from both sides to get ready to quilt.
I stitched in the ditch between B and C and on the top and bottom of R. Stitching in the ditch is just fancy speak for sewing in between the two strips. Start in the center and work your way to the top and then the bottom of your quilt. While you're sewing a straight line, you're going through a lot of layers. Sew slower than normal.
Once you finish quilting, use your rotary cutter to trim so the backing and batting are flush with your quilt top.
Lastly, you'll bind your quilt. I did a binding tutorial on my Cheater Chevron Quilt post. Check it out. For this quilt, I cut six strips 2.5 inches wide to make my continuous binding.
Throw your quilt in the wash with a tinny bit of soap and then dry. This will start the wonderful softening and crinkling process that makes quilts just so wonderful.
I'm personally thrilled that my little miss is still content in her crib. She's loving dragging this quilt all over the place with her. She has also asked to sleep with it every night. I call that a win! Although, I can't wait to see this little gem on her big girl bed!

 Plastic or wooden rings {mine are shower curtain rings for $1.19 at Target}


