12.17.2014

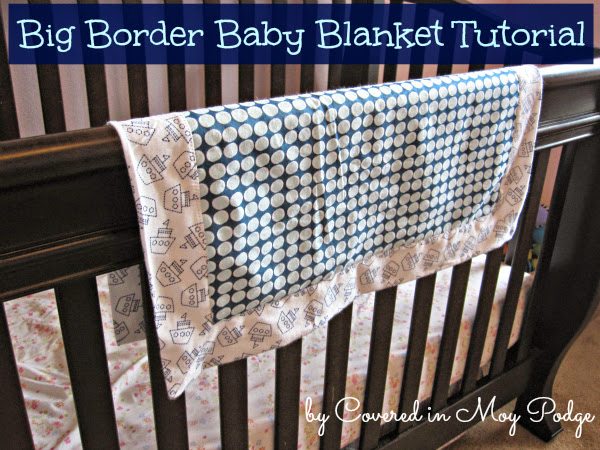
Big Border Baby Blanket Tutorial


Hey friends! Here's a tutorial for a fun baby blanket I first shared at The Grant Life. This blanket features a big border and is perfect for showing off two fun fabrics!


Want to make your own? You'll need:
1 1/4 yd of flannel
1 yd of contrasting flannel
Contrasting thread
Rotary cutter/mat

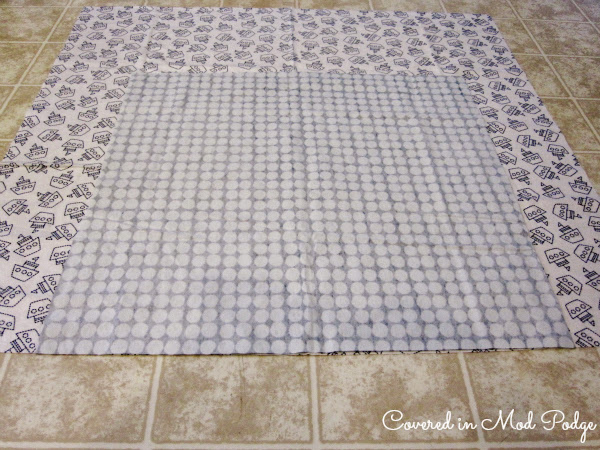
Start out by cutting your back fabric to 42 by 42 inches. Then, cut your front fabric to 32 by 32 inches. You can honestly make this blanket any sized. I like the look of a very thick border. Therefore, I make my back fabric 10 inches larger than my front fabric.


Find a large, clean work space. Lay your back fabric down, right side up.


Then, put your front fabric on top, right side down. You'll want to center your fabric on the edge of one side. So, you'll have five inches of back fabric on each side of your front fabric.

Sew along this edge, using your presser foot your seam allowance guide. Start and stop your seam 1/4 inch from the beginning and then end.  Back stitch at the beginning and end of your seam.


Now you'll move your blanket back to the ground. Its time to center your front fabric along the edge of the next side of your back fabric. You'll again have five inches on either side of your front fabric. This will form a triangle of your back fabric on the side where you had sewn along the other edge.


Sew again, starting and stopping leaving 1/4 inch on each side.


Continue on the same way with your third side. On your fourth side, make sure you leave a 5 inch gap in the middle for turning. 


Alright, now its time to get rid of all that excess fabric floating around. You'll do this by cutting off the fabric at the corners. Start by making a triangle with the excess back fabric on one corner. 


Fold the tip of the triangle down to the edge where your front fabric is.


Cut along the fold. Now sew along the open edge you just create. 


Repeat for all four corners.

Go ahead and turn your blanket. Press well, making sure to turn in the fabric from your turning gap.


When you turn your blanket, make sure your corners are pushed out all the way.

Now, top stitch along the seam between the front and back fabrics. Make sure you're careful to close the gap you left for turning the blanket. 


Once you get the hang of this blanket, you'll easily be able to make it in 30 minutes, cutting included!


Use your scraps for a bow and you have a simple, affordable baby gift! I added my favorite, miracle working diaper rash cream because I love letting new mommas know what worked for us. Let others learn from my trial and error! 

8.15.2014

Doing Good with Just Between Friends {Plus a Giveaway!}


For those of you who've been around for awhile, you're getting very used to my frequent love songs to Just Between Friends Fort Worth. It's just about sale time {eeekkk!!!}, so its time for another installment of why I'm infatuated with JBF. 


First, some JBF basics. JBF is a consignment sale for children's clothes, gear, accessories, and all that other stuff {and kids do seem to come with a lot of stuff} that you could need for your little ones. There's also plenty of maternity clothes and gear too! This sale is the largest of it's kind in the state of Texas! It's held at the Will Roger's Memorial Center and open to the public August 30-September 6. Here's a link to the full calendar.

Now, on to why I love JBF. They are committed to giving back to the community. Unsold items are donated to local organizations meeting the needs of moms and kiddos in our community. In addition, JBF is committed to giving back through the Wall of Wishes.


This sale, the Wall of Wishes is benefiting NewDay Services. NewDay Services provides:

1) Non-intrusive chaplaincy through the family and juvenile courts2) Educational and life skill programs for children and adults to cope with their circumstances3) An introduction to other community and faith-based service providers to broaden their network of support.

The Wall of Wishes is like an Angel Tree. Upon entering the sale, you'll see a board with request. Grab a card, shop for the item, and JBF will take care of getting it to NewDay. What a great way to help support programs working in our local communities!

Now, for the giveaway!

JBF is offering a $15 Gift Certificate to the Fall Sale. $15 goes sooooo far at JBF! Use the Rafflecopter to enter. And be sure to check out the rule below!

a Rafflecopter giveaway

  • Winner will be notified via email and have 24 hours to respond. If they fail to respond, a new winner will be chosen.
  • Winners can only win once per sale.
  • All entries will be verified!!!


JBF Fort Worth has compensated me for the post. Both the opinions and text are my own. I truly get giddy talking about the wonders of this sale. I would not work with them if I wasn't in love. More questions? Check out my disclosure page!


7.25.2014

Enchiladas Verde Cups {or dinner in 45 minutes or less}


Quick, yummy, and toddler friendly is the name of the game for my dinners. Really, its toddler friendly but still something my husband and I actually want to eat. These Enchiladas Verde Cups fit that bill. They are ready in 45 minutes. Emma thinks its so fun that her food is in a tortilla cup. Let's face it...my husband thinks the same thing!

So these cups are a much cheaper alternative to those cute little pre-made tortilla cups you can buy at the store. All you need is a small pack of tortillas {easy to find on sale for less than $2} and you can make 12. The store bought cups are like $4 for 6!

You'll need:
9 tortillas
Green enchilada sauce
Small can of diced green chilies
1 lb. ground chicken breast
6 oz monetary jack cheese, shredded {or pepper jack if your kiddos can handle the heat}
4 oz low fat cream cheese, softened
1 tbsp cumin
1 1/2 tsp chili powder
1 tbsp lime juice

Preheat the oven to 350.

Start out by browning the ground chicken with the cumin and chili powder. You could substitute ground turkey or ground beef if you can't find ground chicken.


While meat is browning, use a pizza cutter to cut 9 tortillas into fourths.


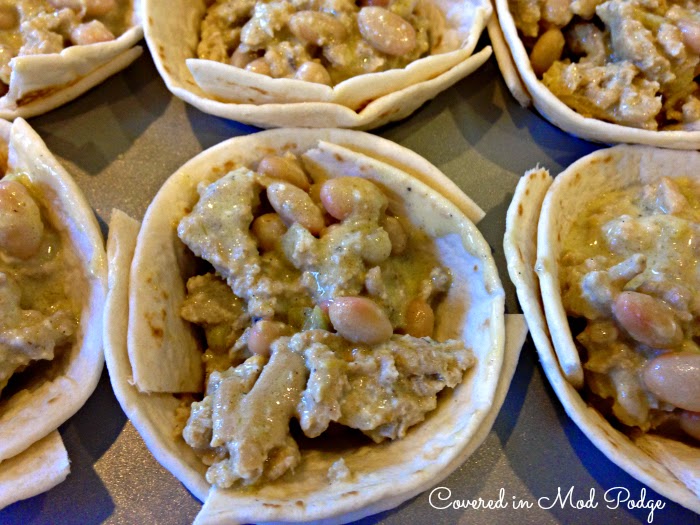
Spray muffin pan with non-stick cooking spray. Squish in three tortilla pieces into each cup, overlapping so there's no gaps. This will create your cup.

Once meat is browned, stir in cream cheese, green chilies, and half of enchilada sauce.


A note about the enchilada sauce. This stuff from Frontera is amazing. If you aren't making your own, its so worth the extra cost to get this bag rather than the store brand canned stuff. I wish that Frontera was paying me to say that. But they're not...its just that good.


Add a little less than 1/3 a cup of the mixture to each of the 12 tortilla cups.


Drizzle remaining enchilada sauce and then add shredded cheese.


Tent these beauties with tin foil. Bake for 15 minutes.

Remove tin foil and bake for an additional 15 minutes, or until the cheese is nice and browned.


Serve with a salad and you've got yourself a yummy meal in 45 minutes or less.

3.31.2014

Dancing Ribbon Rings Tutorial

I first shared this fun 30 minute craft tutorial over at The Ribbon Retreat. The provided me with the materials in exchange for this tutorial. Check out my disclosure page if you have any questions!


Little Miss has really gotten into singing and dancing lately. Her songs go a little something like "sing....song....sing a sing sing.....song." I can't handle the cuteness and hilariousness of it all. She also busts a move to nearly any song that comes on.

In an attempt to build up her opportunities for imaginative play, I've been looking for toys that foster creative play {and don't have batteries!}. These Dancing Ribbon Rings fit that bill. They are great for promoting imaginative play, movement, and altogether silliness {my favorite!}.

These great little Dancing Ribbon Rings couldn't be easier to make. You'll need:

Plastic or wooden rings {mine are shower curtain rings for $1.19 at Target}
Variety of ribbon {I used Grosgrain 5/8" in Ocean Blue, 1/4" in White, and 3/8" in Tutti Frutti, and TRR Chevron 7/8" in Apple Green and Pink)
Hot glue/glue gun
Scissors
Something to seal the ribbons {lighter, fray check, heat tool}


Start out by wrapping your rings in ribbon. Secure the ribbon at the beginning and end using a dab of hot glue.


Then, cut three different colors of ribbon per ribbon ring. You'll want them to be between 2 and 3 feet long. I cut a notch for a nice extra touch. You'll want to use your sealing method of choice on each ribbon end to prevent fraying.


Knot your ribbon at the middle to your ring. I think three ribbons of various lengths and thicknesses per ring is a good look. Feel free to add more or less!


Hand them off to your tiny dancer and watch the crazy moves! It's that simple!


These can be made in a huge variety of colors and sizes for a whole host of needs. I'm already thinking they would make great party favors! They are also perfect for Easter baskets!


3.24.2014

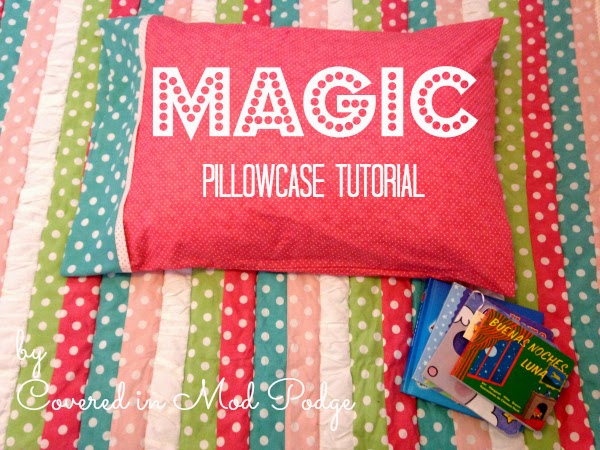
Magic Pillowcase Tutorial {or how cool was I in the third grade!?!}


Emma's Ruffled Strip Quilt needed a coordinating pillowcase. The folks at The Ribbon Retreat provided me with the fabric in exchange for this tutorial. Check out my Disclosure page if you have questions!

Between the second and third grade, my family moved from Northern to Southern California. I did not take the move well, at all. In attempts to get me plugged in to my new community, my mom signed me up for dance, gymnastics, Girl Scouts, basketball, and sewing lessons.

Of all things, my mom decided that sewing lessons should be apart of the making me feel like I fit in. I took them for about a year. Anyone else wondering about how this helped with the fitting in thing? It sure didn't! Girl Scouts saved me. I put away my sewing machine and never looked back.

That is, until I found out I was pregnant with my daughter. They wanted me to pay how much for a blanket I could make myself!?! I am so glad that I pulled that sewing machine out. It's allowed me to develop a wonderful hobby and make some great things for my little girl. I am so proud to have a momma made quilt headed to her big girl bed.

What's all this have to do with today's tutorial? Well I'm reaching back to a lesson learned in the third grade. It's called the Magic Pillowcase. What makes this pillowcase magic is that all of the seams are encased. No finishing seams and no worrying about fraying through the multitude of washes that bedding requires.

You Need:
3/4 yd main fabric (Essential Dots by Moda in Peony)
2 inches trim fabric (Dottie by Moda in Teal)
Rotary cutter, ruler, and self healing mat
Sewing machine and thread

Prewash and iron your fabric. Trim off selvedges to make all the fabrics the same widths.


Fold your cuff fabric in half, wrong sides together. Press.

Repeat for your two inch strip.


Unfold the cuff fabric and place it, right side up, on a clean work surface.


Place your main fabric on top of the cuff fabric.


Place the trim fabric on top of the main fabric. Make sure all three edges are lined up.


Grab the bottom of your main fabric and roll it up until it is about four inches from the top.


Take the bottom of the cuff fabric and fold it up over the roll. Line up the bottom of the cuff fabric with all the other edges. Pin all layers.

Now sew along that edge (with all four edges) with a presser foot seam allowance. You'll create a tube. Pull the tube right side out.


Fold the fabric in half, like a pillowcase. Trim your edges to make sure everything is even.


Now, you'll encase the side and bottom seams using French Seams. Start by folding your fabric so it looks like a pillow case, wrong sides together. Pin the along the raw side and the bottom and sew using a scant 1/4 inch seam allowance (that's fancy speak for a little less than 1/4 inch).


Turn the pillowcase wrong side out. Press well. Then, sew along the bottom and the once raw edge using a presser seam allowance. This will encase your seam. Now you've made a French Seam.


Turn your pillowcase right side out, slip in a pillow, and you're all set!


This pillowcase is holding up great, wash after wash. I love that there's no exposed seams.