3.24.2014

Magic Pillowcase Tutorial {or how cool was I in the third grade!?!}


Emma's Ruffled Strip Quilt needed a coordinating pillowcase. The folks at The Ribbon Retreat provided me with the fabric in exchange for this tutorial. Check out my Disclosure page if you have questions!

Between the second and third grade, my family moved from Northern to Southern California. I did not take the move well, at all. In attempts to get me plugged in to my new community, my mom signed me up for dance, gymnastics, Girl Scouts, basketball, and sewing lessons.

Of all things, my mom decided that sewing lessons should be apart of the making me feel like I fit in. I took them for about a year. Anyone else wondering about how this helped with the fitting in thing? It sure didn't! Girl Scouts saved me. I put away my sewing machine and never looked back.

That is, until I found out I was pregnant with my daughter. They wanted me to pay how much for a blanket I could make myself!?! I am so glad that I pulled that sewing machine out. It's allowed me to develop a wonderful hobby and make some great things for my little girl. I am so proud to have a momma made quilt headed to her big girl bed.

What's all this have to do with today's tutorial? Well I'm reaching back to a lesson learned in the third grade. It's called the Magic Pillowcase. What makes this pillowcase magic is that all of the seams are encased. No finishing seams and no worrying about fraying through the multitude of washes that bedding requires.

You Need:
3/4 yd main fabric (Essential Dots by Moda in Peony)
2 inches trim fabric (Dottie by Moda in Teal)
Rotary cutter, ruler, and self healing mat
Sewing machine and thread

Prewash and iron your fabric. Trim off selvedges to make all the fabrics the same widths.
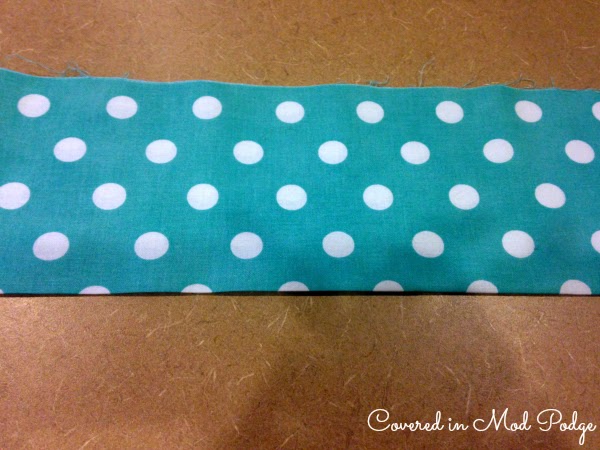

Fold your cuff fabric in half, wrong sides together. Press.

Repeat for your two inch strip.


Unfold the cuff fabric and place it, right side up, on a clean work surface.


Place your main fabric on top of the cuff fabric.


Place the trim fabric on top of the main fabric. Make sure all three edges are lined up.


Grab the bottom of your main fabric and roll it up until it is about four inches from the top.


Take the bottom of the cuff fabric and fold it up over the roll. Line up the bottom of the cuff fabric with all the other edges. Pin all layers.

Now sew along that edge (with all four edges) with a presser foot seam allowance. You'll create a tube. Pull the tube right side out.


Fold the fabric in half, like a pillowcase. Trim your edges to make sure everything is even.


Now, you'll encase the side and bottom seams using French Seams. Start by folding your fabric so it looks like a pillow case, wrong sides together. Pin the along the raw side and the bottom and sew using a scant 1/4 inch seam allowance (that's fancy speak for a little less than 1/4 inch).


Turn the pillowcase wrong side out. Press well. Then, sew along the bottom and the once raw edge using a presser seam allowance. This will encase your seam. Now you've made a French Seam.


Turn your pillowcase right side out, slip in a pillow, and you're all set!


This pillowcase is holding up great, wash after wash. I love that there's no exposed seams.


3.18.2014

Ruffled Strip Quilt Tutorial {or a big girl room in the making}


I first shared this tutorial over at The Ribbon Retreat. I have a big old crush on this quilt, so I wanted to make sure you all got a chance to see it! The Ribbon Retreat provided me with the fabric for this quilt in exchange for a tutorial. Questions? Check out my Disclosure page!

My daughter is getting to the age of transitioning from a crib to a big girl bed. Thankfully, she is showing no signs of crawling her way out and is quite content with her current sleeping arrangement. We have a convertible crib that we'll transition to a toddler bed. While we were blessed with a hand me down Pottery Bar bedding set that has served us well, I'm excited to use this bed transition as an excuse to get some momma made into my little miss's bedding.


The finished quilt is a generous toddler 67X42 inches. It's a bit big for a toddler bed but great for growing with the kiddo. I envision that in years to come she'll use it as a lap quilt.


I am a relative quilting novice. This quit design is perfect for novice and expert quilters alike. You can make this quilt a breeze by buying two jelly rolls to avoid cutting. The strips make cutting and sewing fast. The ruffles give the quilt great texture and a little something different.


Want to make your own? You'll need:
3/4 yards of 4 different fabrics (Dottie by Moda in Baby Pink, Teal, Peony, and Bella by Moda in Bleached White)
1/2 yd of 1 fabric (Dottie by Moda in Spring Green)
1/2 yd fabric for binding (Essential Dots in White/Peony)
2 1/4 yd fabric for backing (Essential Dots in Teal)
2 1/4 yd of batting (from local craft store)


I'm going to call my fabrics A, B, C, D, and R (for ruffles). I'm a rather conservative pattern kind of gal. Therefore, I went with a repeating pattern of my fabrics. You could totally mix the order up to something  random if you are braver than I am. Do what seems right for your style and your fabrics.


Hands down the best thing about quilting is that you don't have to prewash your fabrics (yes, I hate pre-washing that much!). You should, however iron all of your fabrics before cutting. This will allow for a much more accurate cut and a better final product.


First, let's cut your strips. You'll need to cut 6 strips 3 inches wide by the width of the fabric (WOF) of A, B, and C. You'll need 5 strips 3 inches by WOF of fabric D. You need 10 strips 3 1/2 inches wide by WOF of fabric R. The increased width of R is to allow for the ruffling seams you'll run down both sides of the fabric.


Speaking of ruffling, it's the first thing to take care of. We're going to start by turning the 10 strips into 5 super long strips. Pin the short sides of two strips right sides together. Sew using a presser foot seam allowance. 

Press the seam to one side. Repeat this process until you have your five strips.


You're going to run ruffling seams down both of the long sides of each strip. If you have a preferred ruffling method, please use it. I'm a fan of setting my tension to the tightest setting and my stitch length to the longest setting. Leaving some seriously long strings, sew a stitch down the side, making sure NOT to back stitch at the beginning or end. This should magically ruffle your strip. If you aren't getting a tight enough ruffle, you can apply gentle pressure to your thread right after it comes off the spool. Repeat this process for both sides of all five ruffle strips. The long strings allow you to easily adjust your ruffle if necessary.


Now, it's time to piece the top. You're going to sew your strips together in your pattern or randomness of your choice, using a presser foot seam allowance. If you're following my pattern, it's A, B, C, D, R and repeat.


To start, pin your first to strips right sides together and sew. Press your seam (up, down, open...it's really your preference here). The take your next strip and continue the process.


When you hit the ruffle strip, use the stitch line on the ruffled fabric rather than the edge of the fabric as what you match your other strip up to. This will make sure that your ruffle stitches are all hidden and don't make an unwanted appearance on the front of your quilt.


Before pressing the seam, trim your ruffle seam down to the same height as your regular strip.


And this point, I recommend putting this chunk of your quilt aside and starting the pattern fresh again. This keeps things from becoming too unwieldy. Your very last chunk of quilt should be just an A, B, C chunk.


Now, go ahead and join the chunks of your quilt together. Use your rotary cutter to even up your quilt edges. Then, ta da! You have a quilt top all pieced!


Now it's time to talk quilting. I highly recommend using painters tape or masking tape and curved quilting safety pins to help in this process.


You'll want to cut your quilt backing about two inches bigger than your quilt top. For me, this was 44 X 69 inches. Then, cut your batting about an inch bigger than your quilt top (43 X 68 inches).


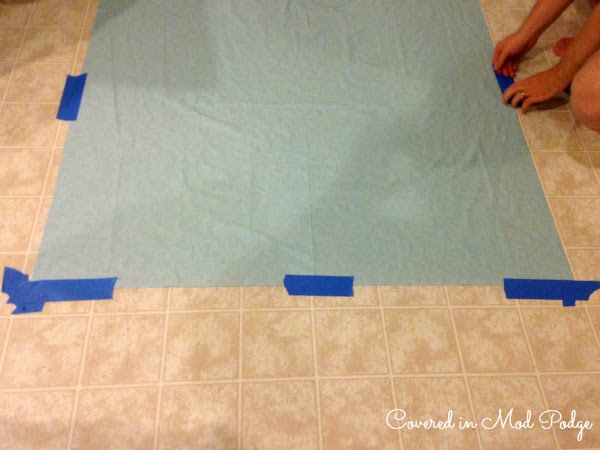
Find a clean, smooth surface to work with. Lay out your backing fabric, wrong side up. Work carefully to completely smooth it out. Place tape around the perimeter of your fabric to help hold everything in place.


Center your batting on top of the quilt backing.


Then, center your quilt top on the batting.


Now, it's time to get to work with your curved quilting pins. You should start in the middle and work your way out. Stagger your pins about every two inches. When pinning, keep in mind where you'll be sewing your quilting lines. You want to keep pins out of the way so you don't run into one and snap a needle.


Before you start quilting, change your bobbin to a color that blends in with your quilt backing. Roll your quilt up from both sides to get ready to quilt.


 I stitched in the ditch between B and C and on the top and bottom of R. Stitching in the ditch is just fancy speak for sewing in between the two strips. Start in the center and work your way to the top and then the bottom of your quilt. While you're sewing a straight line, you're going through a lot of layers. Sew slower than normal.


Once you finish quilting, use your rotary cutter to trim so the backing and batting are flush with your quilt top.


Lastly, you'll bind your quilt. I did a binding tutorial on my Cheater Chevron Quilt post. Check it out. For this quilt, I cut six strips 2.5 inches wide to make my continuous binding.


Throw your quilt in the wash with a tinny bit of soap and then dry. This will start the wonderful softening and crinkling process that makes quilts just so wonderful.


I'm personally thrilled that my little miss is still content in her crib. She's loving dragging this quilt all over the place with her. She has also asked to sleep with it every night. I call that a win! Although, I can't wait to see this little gem on her big girl bed!


2.04.2014

Fold and Go Market Bag Tutorial {or I'm smitten with this fabric}


This post was originally shared over at The Ribbon Retreat. They kindly provided me with the fabric used for this project in exchange for the tutorial. I love working with the Ribbon Retreat and would not recommend them to you without thinking they are a wonderful place to shop for all your sewing needs! 

I'm a big fan of reusable bags for grocery shopping. They hold a ton and don't break on me like plastic and paper tend to. But they're also big, clumsy, and annoying to carry around. Therefore, I don't tend to take them with me when I'm running smaller errands.

That's where this little bag comes in. It's lightweight and folds up to fit easily into your already too full purse {or diaper bag}. It's also roomy enough to hold a normal haul from the drug store or even clothes shopping!

What you'll need:
1/2 yd of main fabric {I used Floral Bloom in Aqua from Happy Go Lucky}
Fat Quarter of lining fabric {I used Jump in Multi from Happy Go Lucky}
Fat Quarter of pocket fabric {I used Jump in Lime from Happy Go Lucky}
6 inches of elastic cording
1 coordinating button {I used 1/2 inch covered button kit}
Thread {I used Pearl}
Sewing machine, rotary cutter, etc.
Pattern

Start by cutting out and assembling your pattern. You'll match up A to A, B to B, etc. You'll create a pattern for the main bag and the lining.


Cut out two of the main bag and two of the lining on the fold. Be sure you watch out for directional patterns on your fabric. Also, cut out an 8.75 inch by 5.5 inch square for your pocket.

Let's start by assembling your pocket. Finish the top of your pocket by folding the edge down 1/4 inch {wrong sides together} and pressing. Then fold down again 1/4 inch, press, and pin. Sew close to the edge of the fold.


Press the rest of the three sides in 1/4 inch {wrong sides together}.


Tie a knot in your elastic cord, making a small loop.


No for pocket placement. Use the corner of the cut out notch on the bottom, left side of the bag as your measuring start point. Measure up 2.5 inches and in 4 inches from that corner. Pin well. Insert the elastic cord loop at the middle of the right side of your rectangle. Sew the three sides of your pocket to the bag, leaving the top open. Sew close to the edge of the pocket. Be careful and go slow when sewing over the cord. It's a lot for your machine to take!


Finish the bottom of your lining by folding up 1/4 inch, pressing, folding up another 1/4 inch and sewing.


Place one of your linings on top of one of the main bag pieces, right sides together and pin. Sew along the outside of the handle and the mouth of the bag {the curved parts}. Do no sew the top of the straps {the straight parts}. Repeat with the second bag and lining pieces.

Either clip the curves close to the seam allowance {careful not to clip the seam itself} or use pinking shears to trim seam allowance. Don't skip this step. It will really help the curve lay nicely.


Flip one of your two bag pieces right side out. Press well.


Insert the handles of the right side out bag into the handles of the inside out bag. It can take some fussing to get them shoved in there and fitting nicely.


Line up the tops of the handles and pin.

Sew the handles, going over them two or three times. This will reinforce the seam and give your bag added strength to take on heavy loads.


Now, pull your inside out bag right side out. Press well. Top stitch along the outsides of the handles and the inside circle.

Now it's time to finish the sides and the bottom of your bag. You'll use french seams for added strength and gussets to make your bag nice and roomy.


Start by lining up the edges and bottom of your bag, wrong sides touching. Pin along the sides and bottom, leaving the cut out squares be.

Sew using a 1/4 inch seam allowance down the sides and across the bottom of the bag. Do not sew along the squares.


Turn bag inside out. Press side and bottom seams well. Sew along these seams, using a presser foot seam allowance.


Now its time to tackle the gussets. You'll be making these into french seams as well. Pull the two sides of the fabric apart and then line up the side seams. This will leave you with the bottom seams meeting in the middle of the sides you just lined up. Pin. Clear as mud? Good! Check out the picture for some clarification.

Sew using a 1/4 inch seam allowance. Carefully clip corners. Turn bag inside out. Press seams well. Sew, using a presser foot seam allowance.


If using covered button, follow the instructions on your kit. Then, sew button onto the main fabric, just to the left of your pocket.


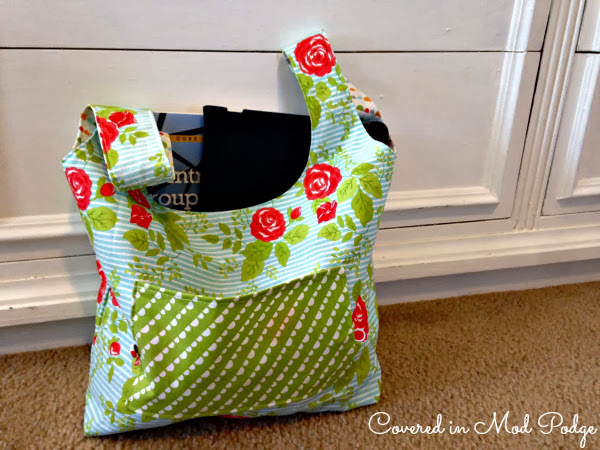
Ta-da! You now have a cute little market bag fold up and throw in your purse.

Wondering just how to fold up your bag? Here's a visual!


Come party with me! C.R.A.F.TMommy By Day, Crafter By NightShwin & ShwinTip JunkieSouthern LovelyUncommon DesignsSomewhat SimpleYesterday on TuesdayHouse of Hempworths52 MantelsThe CSI ProjectSerenity NowTatertots and JelloFamily Ever AfterThe Grant LifePositively SplendidI {Heart} Nap TimeIt's Overflowing

2.03.2014

First Time Children's Consignment Sale Shopper Tips

This post is brought to you by Just Between Friends Fort Worth. The love it professes is all my own. Please check out my Disclosures page if you have any questions!


*Giveaway Closed*

By now, I'm sure you are all getting used to by biannual love letter to Just Between Friends Fort Worth. What can I say? I'm smitten with this sale!

For those of you who might be new around here, JBF Fort Worth is the largest in Texas consignment sale for kids clothes and gear and maternity item. Held at the Will Roger's Center, this sale is giant. It's like a Costco filled with just gently used kid's clothes, toys, and gear.

The enormity of it all can be daunting. I've heard people say they don't shop JBF Fort Worth because its just too overwhelming for them. The sheer size of the sale is what I love about it. More stuff = a better selection. It allows me to get everything I could need for my daughter for the season for 60% {or more} off of retail.

I've been shopping JBF Fort Worth since before my daughter was born {over three years now}. So, I want to give first time shoppers some hints, tips, and tricks that I've picked up over the years. {Thinking of consigning for the first time? Check out this post!}

1. Come prepared!
Take inventory of your kiddo's closet. What are they going to need for the upcoming season? Are there any special outfits {holidays, birthday} that you should be keeping an eye out for? Speaking of birthdays, are there presents for your kiddos or friends you should be looking for? Going in with a list of needed items helps reduce the "holy cow there's a ton of stuff here" feeling. It also helps me make sure I don't walk out with a ton of stuff I don't need.

2. Bring something to haul your goods in!
I always bring a white plastic laundry basket to load up with my goods. I just kick down the aisle with me as I browse. Keep in mind, this is just shopping for one toddler and I normally get very little toys/gear. Scale accordingly. Lots of shoppers bring large laundry baskets, trash cans on wheels {used just for sales} or garment racks. Making a list should help you know how big of a hauling device you should plan to bring.

3. Use the hold section and sold tags!
If you're planing on shopping for larger items, the hold section and sale tags will be your friends. You can snag hold tags from the tables just outside the sale. These little gems will help you not have to haul around a whole crib with you while shopping for clothes. You can also take advantage of the hold area at the back of the sale. I use the hold section for larger items that I'm debating about while I do the rest of my shopping.

4. Look for high desired items first!
Wagons are the holy grail of this sale. Especially during the spring sale! Oh for the want of a good quality, great price wagon! What I wouldn't give {as long as it's less than $40} for a great wagon! It you're looking for wagons, pack and plays, and other larger item that every parent needs for a new kiddo, go there first thing. Then, use the sold tags or hold section.

5. Shop early!
There are a host of ways to get into the sale early. One amazing opportunity to get in early for soon to be or first time parents {including adoptive parents} is to register as a First Time Parent. By registering online by February 27, you and a guest get in between 3pm and 8pm on March 1st. That's before the general public. You can also Volunteer or Consign to get in before everyone else. Not an option for you? Try shopping after the mid-sale drop off. I am a firm believer that the early bird gets the worm at this sale! Check out the full calendar here!

Are you excited to shop? Well JBF Fort Worth is giving one lucky reader $15 to get their shopping spree off to a great start. I'm serious...$15 at JBF goes such a long way! Enter using the Rafflecopter below.


As a side note, I'm now on Instagram! Be sure to follow along for a live Instagraming session on March 1st at 8am {ish. Let's face it...It's a Saturday morning. Sometimes getting out of bed and off somewhere kiddo free doesn't always go as planed.}. I'll be sharing my finds as well as some other great deals as I shop at JBF Fort Worth!