

This post was originally shared over at The Ribbon Retreat. They kindly provided me with the fabric used for this project in exchange for the tutorial. I love working with the Ribbon Retreat and would not recommend them to you without thinking they are a wonderful place to shop for all your sewing needs!
I'm a big fan of reusable bags for grocery shopping. They hold a ton and don't break on me like plastic and paper tend to. But they're also big, clumsy, and annoying to carry around. Therefore, I don't tend to take them with me when I'm running smaller errands.
That's where this little bag comes in. It's lightweight and folds up to fit easily into your already too full purse {or diaper bag}. It's also roomy enough to hold a normal haul from the drug store or even clothes shopping!
What you'll need:
1/2 yd of main fabric {I used Floral Bloom in Aqua from Happy Go Lucky}
Fat Quarter of lining fabric {I used Jump in Multi from Happy Go Lucky}
Fat Quarter of pocket fabric {I used Jump in Lime from Happy Go Lucky}
6 inches of elastic cording
1 coordinating button {I used 1/2 inch covered button kit}
Thread {I used Pearl}
Sewing machine, rotary cutter, etc.
Pattern
Start by cutting out and assembling your pattern. You'll match up A to A, B to B, etc. You'll create a pattern for the main bag and the lining.

Cut out two of the main bag and two of the lining on the fold. Be sure you watch out for directional patterns on your fabric. Also, cut out an 8.75 inch by 5.5 inch square for your pocket.
Let's start by assembling your pocket. Finish the top of your pocket by folding the edge down 1/4 inch {wrong sides together} and pressing. Then fold down again 1/4 inch, press, and pin. Sew close to the edge of the fold.

Press the rest of the three sides in 1/4 inch {wrong sides together}.

Tie a knot in your elastic cord, making a small loop.

No for pocket placement. Use the corner of the cut out notch on the bottom, left side of the bag as your measuring start point. Measure up 2.5 inches and in 4 inches from that corner. Pin well. Insert the elastic cord loop at the middle of the right side of your rectangle. Sew the three sides of your pocket to the bag, leaving the top open. Sew close to the edge of the pocket. Be careful and go slow when sewing over the cord. It's a lot for your machine to take!

Finish the bottom of your lining by folding up 1/4 inch, pressing, folding up another 1/4 inch and sewing.

Place one of your linings on top of one of the main bag pieces, right sides together and pin. Sew along the outside of the handle and the mouth of the bag {the curved parts}. Do no sew the top of the straps {the straight parts}. Repeat with the second bag and lining pieces.
Either clip the curves close to the seam allowance {careful not to clip the seam itself} or use pinking shears to trim seam allowance. Don't skip this step. It will really help the curve lay nicely.

Flip one of your two bag pieces right side out. Press well.

Insert the handles of the right side out bag into the handles of the inside out bag. It can take some fussing to get them shoved in there and fitting nicely.

Line up the tops of the handles and pin.
Sew the handles, going over them two or three times. This will reinforce the seam and give your bag added strength to take on heavy loads.

Now, pull your inside out bag right side out. Press well. Top stitch along the outsides of the handles and the inside circle.
Now it's time to finish the sides and the bottom of your bag. You'll use french seams for added strength and gussets to make your bag nice and roomy.

Start by lining up the edges and bottom of your bag, wrong sides touching. Pin along the sides and bottom, leaving the cut out squares be.
Sew using a 1/4 inch seam allowance down the sides and across the bottom of the bag. Do not sew along the squares.

Turn bag inside out. Press side and bottom seams well. Sew along these seams, using a presser foot seam allowance.

Now its time to tackle the gussets. You'll be making these into french seams as well. Pull the two sides of the fabric apart and then line up the side seams. This will leave you with the bottom seams meeting in the middle of the sides you just lined up. Pin. Clear as mud? Good! Check out the picture for some clarification.
Sew using a 1/4 inch seam allowance. Carefully clip corners. Turn bag inside out. Press seams well. Sew, using a presser foot seam allowance.

If using covered button, follow the instructions on your kit. Then, sew button onto the main fabric, just to the left of your pocket.
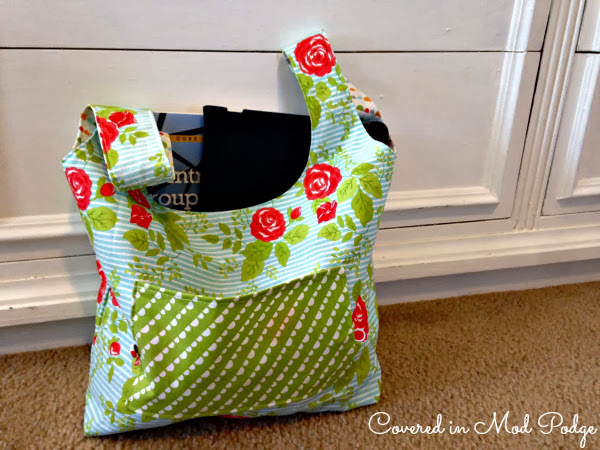
Ta-da! You now have a cute little market bag fold up and throw in your purse.
Wondering just how to fold up your bag? Here's a visual!


Come party with me! C.R.A.F.T, Mommy By Day, Crafter By Night, Shwin & Shwin, Tip Junkie, Southern Lovely, Uncommon Designs, Somewhat Simple, Yesterday on Tuesday, House of Hempworths, 52 Mantels, The CSI Project, Serenity Now, Tatertots and Jello, Family Ever After, The Grant Life, Positively Splendid, I {Heart} Nap Time, It's Overflowing
