3.28.2012

DIY Baby Gate {or my husband calls it a baby cage}


When our little miss started to crawl, we did what many parent do and started looking on Amazon for baby gates. We had a 53 inch gap to fill in and one side that we couldn't drill into. Well, we quickly learned that our gap was too large for pressure mounted gates {which I really, really didn't want}. That, coupled with the inability to drill on one side, left us pretty stuck.   

Let me warn you, this post is very long. However, its filled with pictures and instructions to help you create your own gate!

After suffering through a couple of months of chasing our little miss into the kitchen, I was fed up. So my husband got to googling and found that Alisha @ SungasaBugBaby had shared a great post on making a baby gate. My husband and I were inspired by her idea {and our desire to no longer have to keep chasing little miss all over the house} so we used it as a starting point to make a custom baby gate for under $50.

First, let's start with the supply list. Since everyone's gap is a different size {and most won't have the silly little decorative pillar to deal with}, sharing our cut list won't really help. 

Supply List:
2X2s
1/2 inch, 10 foot long PVC
Gorilla Glue
2 hinges of your choice
Lock of your choice
 Spray paint {we used three cans}
Drill and bit

The gate was essentially made using wood 2x2s as the frame and PVC as the vertical bars. We had our wood and PVC cut at Lowes, since we don't own the appropriate tools to do this on our own. They were very nice and did not charge us for any of the cutting.


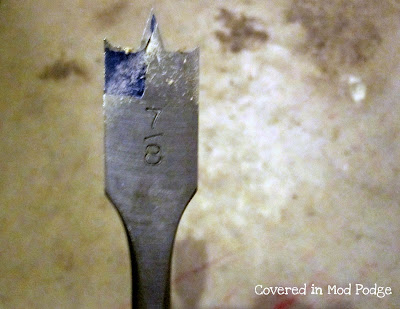
If using a 1/2 inch PVC, you will need a 7/8 inch wood drill bit to drill out the holes. 


You'll start by creating the holes for the PVC pipe. We used 33 inches long PVC bars. The drill depth was 1/2 inch. Make a small indentation with the drill bit before drilling to increase accuracy. The holes need to be drilled both into the top and bottom pieces. Ours were drilled every three inches.


Next, you'll want to pre-assemble the gate to check to make sure everything fits. It will allow you to ensure that your drill depths are deep enough for everything to go together nicely.


Prep your top horizontal 2x2 pieces with screws in order to allow for more easy assembling later on. {Please don't do this on your lament floor in the house you rent!} 

Now, take the two horizontal pieces and screw them into the bottom horizontal piece {Sorry, there's no picture for this step}.


Oh, and don't forget to have a lovely assistant.


In order to assemble your gate pieces, you'll start out by adding Gorilla Glue to one of the bottom horizontal piece's holes. Then, add the PVC. Repeat this process for all of the bottom holes. Put the top piece on {without glue} and allow the bottom to dry. Putting on the top while the bottom dries allows the PVC to dry appropriately positioned. Then, glue your top piece on. After the glue dries, screw in your already prepped screws.

{A note on the glue: Apply liberally. We did not use enough and the glue has already come loose. However, everything is still holding together nicely. The bars just now spin.}

Repeat this process with all of your gate panels {we had three panels}.


Next, you'll want to add your hinges. Make sure the door {the swinging panel} is a 1/4 inch higher than the other panel so that it will glide over your carpet smoothly.


I was surprised by the color selection of the Valspar spray paints at Lowes. The paint will work for both the wood and the PVC. However, you'll have to do a few coats over the PVC. The black text is especially hard to cover up. Spray primer probably would have fixed this problem.


We spray painted the locks so that they wouldn't stand out.

Due to the stud spacing in our house, we had to build a bridge between the studs and then anchor to the bridge. If you have to do this step, attaching the bridge to your gate first will give you more control over your gate placement.


The other side of our gate was attached by drilling straight into a stud. We had to build a cut out in order to get over the decorative pillar and then add an extra piece of wood in order to make up the extra depth.


We built our gate for just about $50, including buying Gorilla glue, a saw, and the drill bit. If you already had these items, your gate cost would be considerably less. Regardless, we're trilled to have found a gate that fits our odd architecture, isn't a cheap plastic eye sore, and was affordable. 


Success!

3.26.2012

April Wreath {or april showers...}


In January, I came up with the concept of having my April wreath be a reflection of the saying "April showers bring May flowers." I had the idea floating around in the back of my head and was really excited about it. I would randomly talk to my husband about it. He found it quite weird!

Then, Family Ever After, Southern Lovely, Ginger Snap Crafts, and The Gunny Sack announced their Pinspired and Rewired competition and I just knew I wanted to make my April Showers wreath for it. 

My Pinspiration {by Fanciful Felt}
My Pinspiration came from a yarn rainbow wreath from Fanciful Felt on Etsy. If you've followed me for any length of time, you know I'm not a big fan of yarn wrapping wreaths. Really, I love the look but I wet a little overboard around Christmas and still need some more time to recover. So, I took the beautiful Pinspiration and made it my own.


I used 1/2 yard of blue quilting cotton to wrap a straw wreath {still in the plastic}. I discovered that straw wreaths are half the price of the foam ones. The finished product isn't as clean of a line as foam. I guess I'm just going to have to wait for the dollar store to start carrying pool noodles in order to make cheep wreath forms!


I used a thread spool to make the rounded shapes of the cloud and the sun. I freehanded the rain drops. Everything was hot glued to clear jewelry stretchy thread and then hot glued to the wreath form. The hanging ribbion is grosgrain ribbion from my stash.

Come Party with me!

Thanks for featuring me!

Visit thecsiproject.com

A Crafty Soiree

I'm entering this wreath in:


3.25.2012

Just a Moment Monday {or would you be interested in?}

Not long after my husband and I got married, I realized I would save a lot of time, energy, and money if I planned out meals in advance and grocery shopped a week at a time. This was especially true because my husband was the one doing the cooking due to my late work schedule. Over time {and due to not living close to an affordable grocery store} that's turned into buying the bulk of my groceries every three weeks and picking up fresh fruits and veggies weekly.

This system works pretty well for us. We're still saving {a lot of} money, and I'm loving that I only have to do a real grocery shopping trip every three weeks. If I plan it right, I can even do it when my little miss is at Mother's Day Out. Man, does that save me some time!

I'm guessing you're starting to wonder what I'm rambling about. I'm a little curious myself! I was wondering if it would be helpful/interesting/something you'd care to read if I post my weekly menu with recipes? Let me know! I don't want to bore you all!

Have a wonderful week!

3.21.2012

The Ooops Skirt {or what happened to being a dress?}


I found a fun little remnant at Joann's that screamed spring dress. So I started looking around for a simple and quick dress to make. I found Jess's Ice Cream Social Dress over at Craftiness is not Optional and I was sold!


The dress was truly quick work. I got it done in less than an hour during nap time. I followed all of Jess's measurements not really thinking about the fact that her tutorial was based on a two year old. When my little miss woke up, I threw the dress on her and realized there was a problem.


The ruffled portion of the dress was just too tall. It ended up in her arm pits. It looked silly and I'm sure it wasn't that comfortable.

So, I ripped off the sleeves and had myself a skirt. It's pretty long on her right now. Between the length and the elastic, I'm thinking this sucker will last well into fall {hopefully into next year, too!}.


This picture offers a preview of our big weekend project. We made a baby gate. In the next week or two there will be tons more pictures as well as a full tutorial. Let me just say, I am soooo happy to not have to keep chasing my speedy little miss into the kitchen and down the hall! {And she's sad not to have unfettered access to the cats' water bowl!}

Come Party with me!


3.20.2012

Glitter iPhone Case {or why not!}


I've had my iPhone 4 for a little over a year now. I try to be nice to it. However, I'm not the most graceful person on earth. It's had a few falls. I've made sure to always keep it in the case to protect the phone. As a result, the case has seen better days. 


I bought this case with my phone. I think it was like $15. I really loved the color and how thin it was. An instance involving my phone and a wall led to a pretty nasty crack in it. Rather than buy a new case, I decided to finally use the glitter I picked up on a whim. 


I super glued the crack and let it dry for about thirty minutes. I then painted on a layer of Mod Podge and dumped glitter all over it. I let it dry about an hour before I put a thick top coat of Mod Podge on. I let that coat drive over night before I painted on another top coat. I let the whole thing dry over night again before putting it to use.


I've been using the case for about a week now and Its showing no signs of wear. There has been no random glitter showing up places. The case does feel a bit tacky. But, nothing has embedded itself into it. I've also got a ton of complements on it! Surprisingly, only one has been from a thirteen year old girl!

If I was to do it again, I'd use a much finner glitter. I would have loved to use Martha Stewart's fine glitter. But, that glitter costs an arm and a leg and the kind I used was $1!. Maybe next time?

Come Party with me!

3.19.2012

Just a Moment Monday {or homework sucks}

I'm currently working on my Master's in Social Work degree through the University of New England. I am apart of their distance learning program. I choose this degree path due to the reputation of UNE in the social work field as well as the flexibility the program offered.

I knew I wanted to get my MSW. I also knew that my husband wasn't going to be able to find the kind of employment he truly wanted in Sacramento. Since he's the bread winner {they don't pay those of us in the helping profession squat diddily}, I knew we'd need to move when he found the right opportunity. Rather than wait around for that to happen and then apply to a program in our new area, I decided to give UNE a go. Had I waited, I would have just been starting a program in August {and driving and 1.5 hrs each way several times a week}. Instead, I'm half way through my degree.

Being in classes and having a nine month old has been challenging. My little miss is endlessly curious and loves to "help" me type. We're at the point now that if I have my computer out, she has to "help." It's made getting homework done frustrating. Its also made doing anything else but homework during her naps hard.

After spending a couple of hours doing homework today, I've decided that homework sucks. This is a conclusion I come to almost every day. Its no new revelation {and its probably not worth sharing with you guys}. Yet, I felt like saying it on a grand scale. So, I'll say it again...HOMEWORK SUCKS!

Have a wonderful week, everyone! Thanks so much for taking the time to read my blog. It truly means a lot to me!

3.14.2012

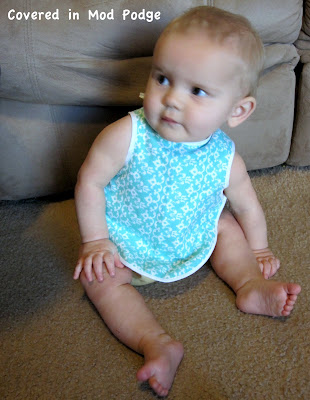
Bapron {or no more eating the bib!}

 Jess over at Craftiness is not Optional has come to my rescue with the bapron. Its like an apron and a bib had a baby! Oh, and what a baby it is! 

Emma has a thing for chewing on her bib. And in doing so, she gets her food all over her shirt. It makes the bib less than helpful.

Enter the Bapron. This lovely little diddy is going to solve this clothes killing problem. I've made them as baby shower gifts for several friends. They've all been thrilled. I'm so excited to finally have had the time to make one for my little miss.


I used two flannels that I picked up at Joann's $2.50/yd sale. The bias tape is store bought. I haven't braved making my own yet. Its on my to do list, though. 


I have a couple of hints. First, I don't pin. Its just easier to go slow rather than pin down all that bias tape. Second, you can make one of these guys out of a 1/4 of a yard of fabric. Its a tight cut and you have to have a really straight cut of 1/4 of a yard. But, it makes it super affordable!


These pictures were taken on the same day as the spring dress pictures. Again, there were very few pictures of her sitting still. But man she loves the empty paper towel roll!


Thanks for the feature!


3.13.2012

Spring Dress {or finally some time to sew}

{If anyone has an baby safe throat soothing tips, please let me know! My little miss has strep throat.}

Naps have been getting more regular and homework has finally setled down a bit. As a result, I'm getting a little more time to myself. Other than finally finishing the third book of the Hunger Games series, I've started tackling my embarrassingly large pile of projects. 


I've been waiting awhile for the right use for this fun paisley from Hobby Lobby. I used the Charlotte pesant dress pattern from mamastellato. Its the same pattern I used for her dedication dress. I added a solid band instead of a blet with tie this time around. 


We finally had a sunny day to try to get pictures taken of some of my projects. Unfortunately, Emma was not too thrilled with the picture taking thing. However, I'm in love with this picture!


There's not really a good picture of the dress on her. I'm hoping that the dress will grow well with her. There's lot of room in the top portion, so I figure this sucker will turn into a tunic next spring. That should leave plenty of opportunities for some better pictures.


3.12.2012

Just a Moment Monday {or shoes!}


My little miss is getting closer to walking every day. We've been mostly shoeless since birth. Heck, we've been mostly sockless. She just won't keep them on. But as we get closer to walking, I'm realizing its nearly time to bite the bullet and get her some shoes. 

So, I'm wondering what tips and tricks you have for keeping your kiddos in shoes. Where is the best place to buy them? What brands are lasting well? How do you make sure your kiddo comes home with both of them?
I love a cute pair of shoes. But between bad knees, funny shaped feet, and a San Diego upbringing, 99% of the time I'm in my Rainbows. But, I'm rather sure her first {and only pair this expensive} shoes will be baby TOMS!


3.08.2012

Loveables {or an awesome new shop!}

Kelley over at The Grant Life has to be one of the sweetest women in blog land. She is always so kind an encouraging. I always feel like someone {other than my best friend who I may blackmail into reading} is reading my blog because Kelley always comments. 

Well Kelley is celebrating two wonderful accomplishments this week! She has reached 200 followers AND she's opening a shop. She's got a great week of giveaways going on over at The Grant Life. You should check it out!

And, please go check out her wonderful little shop, Loveables


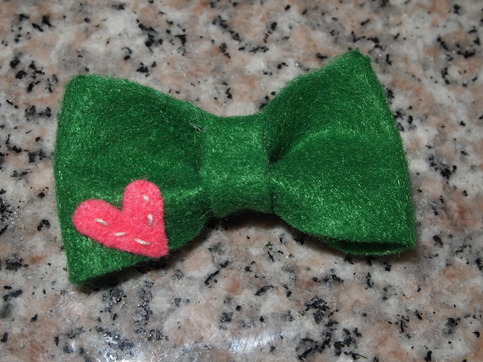
First of all, a heart on a sweet little felt bow! How cute is that! Now only if my little miss would keep anything on her head for more than two seconds!


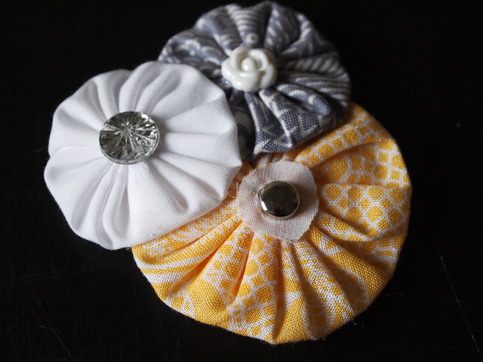
She's also got great yo yo clusters. I love the yellow and grey color combo. Apparently it's a hot color combo for spring {I'm in yoga pants and a free t-shirt from college so you might not want to take my word on fashion!}.

Anyway, go check out Loveables.


{I was not compensated for this post. I just really like Kelley and wanted to highlight a wonderful shop and a great woman.}